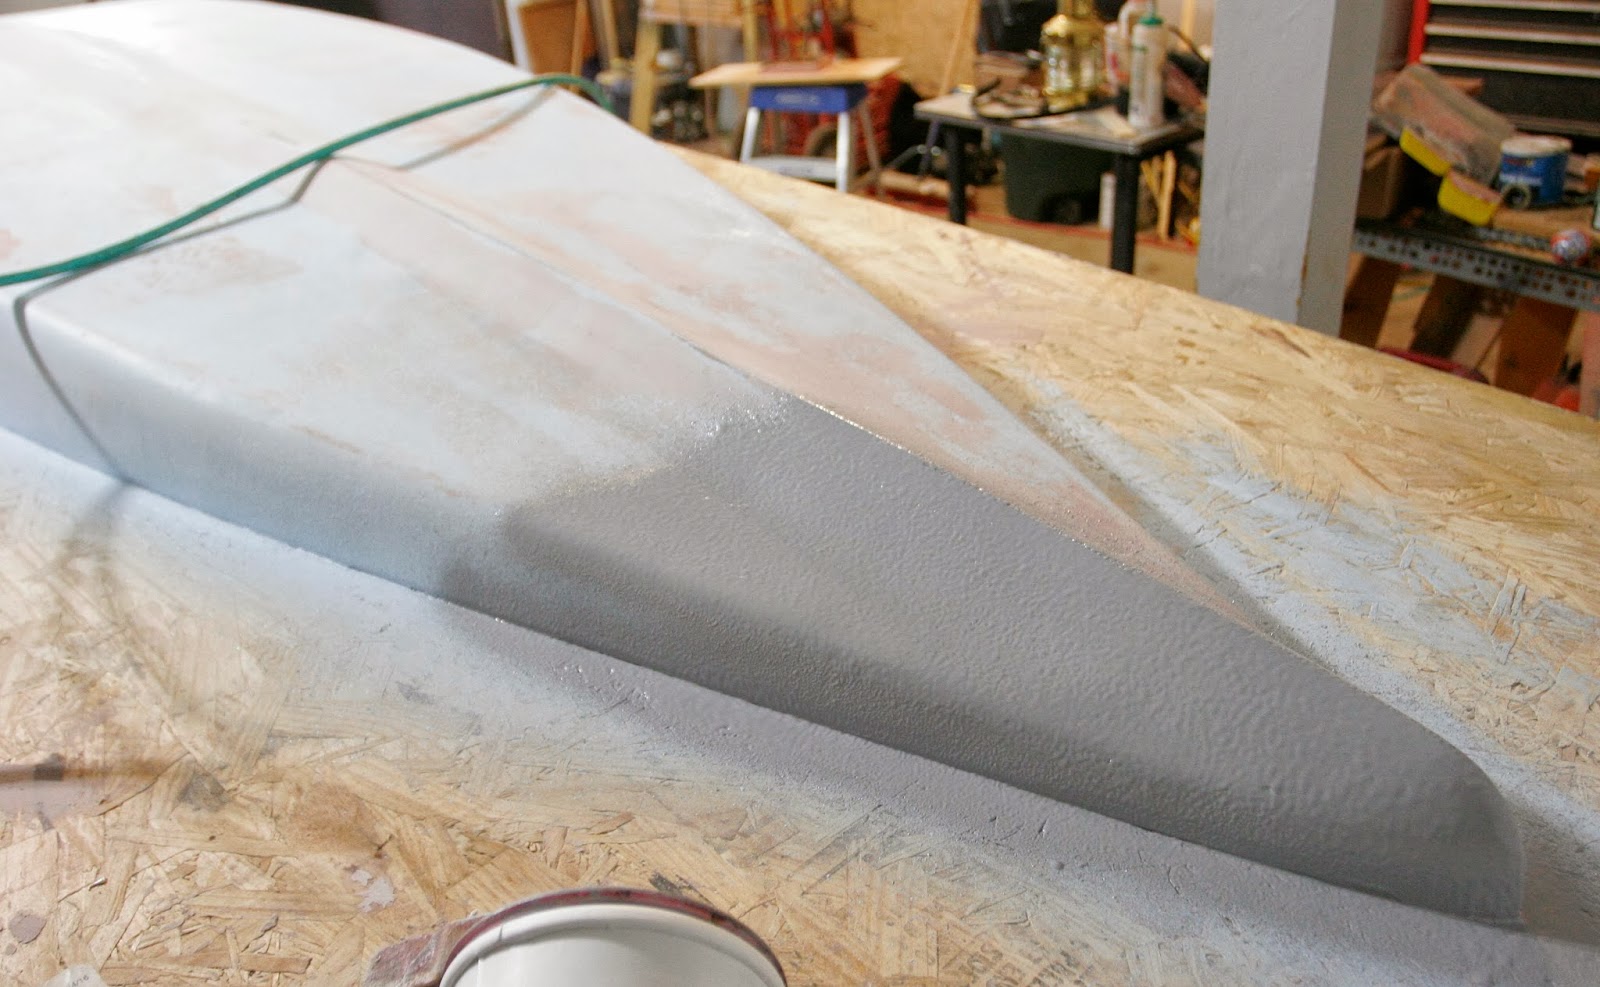
Sanding, fairing, sanding then another layer of gelcoat:
It would be hard to do these steps too many times.
Saturday, February 15, 2014
Sunday, February 9, 2014
New skin on a Laser
We have a older Laser in the shop.
It has a sound hull that is fair. The deck has issues that are common to older glass dingys. That is; deck deformation. It is not delamination. These boats have a thin but solid glass deck. It is not cored. Because the deck is thin, over time, heating and cooling cycles make the skin undulate.
To bring the life back into this boat we needed to address this issue.
Our plan is to fair out the low spots with fairing compound and sand down the high spots.
We did this and today it was fair enough to take the next step.
We overlaid the entire deck with 7oz glass set in epoxy.
This brings the surface back to a uniform material and it makes the deck start to look good again.
After this hardens, we will trim the excess, sand and prepare the surface for a gelcoat overlay.
This will be in a future posting.
It has a sound hull that is fair. The deck has issues that are common to older glass dingys. That is; deck deformation. It is not delamination. These boats have a thin but solid glass deck. It is not cored. Because the deck is thin, over time, heating and cooling cycles make the skin undulate.
To bring the life back into this boat we needed to address this issue.
Our plan is to fair out the low spots with fairing compound and sand down the high spots.
We did this and today it was fair enough to take the next step.
We overlaid the entire deck with 7oz glass set in epoxy.
This brings the surface back to a uniform material and it makes the deck start to look good again.
After this hardens, we will trim the excess, sand and prepare the surface for a gelcoat overlay.
This will be in a future posting.
| The Laser with fairing compound used in low spots. |
| Sanded and ready for glass |
| We are using low viscosity Raka resin with medium hardener. |
| The fabric is draped over the cockpit and will be trimmed out after the epoxy sets. |
Monday, January 20, 2014
Silver Band Saw Running!
We needed it for a project so it finally got done. The big band saw had recently been fitted with guards on the front side of the saw.
The top guard is attached to the traveling guide arm to accommodate various guide heights.
The bottom front guard is fixed but fairly easily removable.
There are no rear guards yet. This will be remedied shortly.
Being on a budget, we improvised with tires for the saw. We cut up an inner tube off of a large forklift curtesy of Jonathan W.
Next we wired up a two pole switch to accommodate the 240v wiring.
The saw is powered by a 2 hp motor. No stationary steam engine yet.
At this point, I was a bit frightened to fire up the motor. Having had limited band saw adjustment experience, getting the upper wheel set to keep that blade on track was a bit daunting.
But after a few quick on and off cycles it was fairly easy to see how the upper wheel adjustments affected the blade alignment.
So far so good. The saw is happy and so am I.
The top guard is attached to the traveling guide arm to accommodate various guide heights.
The bottom front guard is fixed but fairly easily removable.
There are no rear guards yet. This will be remedied shortly.
Next we wired up a two pole switch to accommodate the 240v wiring.
The saw is powered by a 2 hp motor. No stationary steam engine yet.
At this point, I was a bit frightened to fire up the motor. Having had limited band saw adjustment experience, getting the upper wheel set to keep that blade on track was a bit daunting.
But after a few quick on and off cycles it was fairly easy to see how the upper wheel adjustments affected the blade alignment.
So far so good. The saw is happy and so am I.
| The day we acquired the saw. |
| Cleaning out the Babbit bearings. |
Sunday, January 12, 2014
Winter Laser repair
We got a small repair job on a Laser with hull / deck separation anxiety.
The boat has lead a long life and the owner just wants to get a few more summer sails off the beach on a lake in Michigan. To keep it above the waves, we needed to refasten about 6 linear feet of the joint.
On a similar repair to this we used thickened epoxy. But the length of this one made me think 3M 5200 was in order. It appeared that the initial bonding of the hull to deck in these old Lasers was with just the laminating resin (ester based not epoxy).
The 5200 took a while to cure in the cooler temps, but after a week and some sprits of water to help with it's water curing properties, it set up. It is now the strongest part of this hull for sure.
The boat has lead a long life and the owner just wants to get a few more summer sails off the beach on a lake in Michigan. To keep it above the waves, we needed to refasten about 6 linear feet of the joint.
On a similar repair to this we used thickened epoxy. But the length of this one made me think 3M 5200 was in order. It appeared that the initial bonding of the hull to deck in these old Lasers was with just the laminating resin (ester based not epoxy).
The 5200 took a while to cure in the cooler temps, but after a week and some sprits of water to help with it's water curing properties, it set up. It is now the strongest part of this hull for sure.
| Also a nice curvy and slippery hull. 944! |
Thursday, January 9, 2014
USCG case closed
"Mr. Kreutz-
These photos satisfy our compliance requirements and so your case is closed.
Respectfully, Louis Novak
USCG
Subject: case number 13R5134"
This short note brought to a close a long process of getting the Mississippi River Skiff legal in the eyes of the USCG.
Most of the delays were on my end, getting the initial tank test of the skiff and doing the proper calculations.
Additional delays had to do with getting an acceptable capacities label.
The next project will be to talk to the State of Missouri and figure out how to get Manufacturers Title so the boat can be legally sold.
Stay tuned...
Monday, January 6, 2014
Nice breeze, good visibility
| But not a good day to be on the water. Lambert-St. Louis International Airport Lat: 38.76°N Lon: 90.37°W Elev: 568 Last Update on Jan 6, 9:51 am CST | |||||||||||||||
| |||||||||||||||
Tuesday, November 26, 2013
Primo Longboards: The other half of our shop
My sons are into longboard skateboarding and have launched a business.
They are carbon fiber molded decks. We fabricate them alongside our boat projects.
Here are some photos:
They are carbon fiber molded decks. We fabricate them alongside our boat projects.
Here are some photos:
Thursday, November 21, 2013
Sup Plug: Step #6
Gel-coat overcoat.
After extensive sanding of the first layer of gel-coat, the plug is ready for the next layer.
With each layer, the number of issues (divots, surface blemishes etc.) are fewer.
It the following photos you can see areas that we added fairing on top of the first layer of gel-coat.
Once today's coat is added, the problems will be down to a handful.
I expect we will have one more pass.
Today's coat is a grey to contrast with the blue under-layer.
After extensive sanding of the first layer of gel-coat, the plug is ready for the next layer.
With each layer, the number of issues (divots, surface blemishes etc.) are fewer.
It the following photos you can see areas that we added fairing on top of the first layer of gel-coat.
Once today's coat is added, the problems will be down to a handful.
I expect we will have one more pass.
Today's coat is a grey to contrast with the blue under-layer.
Thursday, November 14, 2013
SUP Plug: Step #5 Gel-Coat
The SUP's plug is getting close to the uniform surface we are after. But from experience we know there are problems that are hard to detect. One thing that really helps is to spray on a layer of gel-coat.
By giving the surface a uniform color and material, the eye has a much better chance of spotting problems.
With this first layer of gel-coat, we will add a tint color. Pure white is just too hard to see differences in.
We also added a wax sanding aid to the gel-coat. This allows the surface to cure hard so it is easier to sand.
After this layer hardens, we will continue sanding. What else.
| Here is white gel-coat in spay cup and a concentrated blue tint color we add. |
| Here are the cup gun parts. |
| Mixed, assembled and ready to spray. |
Wednesday, November 13, 2013
SUP Plug: Step #4: rounding the rail edge
To achieve a uniform rail edge we do a few different operations. The initial plywood bend has to be a uniform bend. Once this is accomplished the next step is to use a router with a radius bit to cut the sharp edge off the ply. I used a 1/2 inch radius with a bering guide.
As the fairing progresses on the side wall, we roll a palm sander over this edge. The ply is harder than the fairing material and it slowly brings the rail side wall into conformity.
Once the rail starts to look fair, we then move to this step: Applying fairing material with a curved spreader.
Just a cheap plastic spreader will work.
We bend it and evenly follow the rail edge with the material. This fills in voids and gives us a skim coat to hit with additional sanding with a sponge.
The whole process takes a lot of sanding. No way around it.
As the fairing progresses on the side wall, we roll a palm sander over this edge. The ply is harder than the fairing material and it slowly brings the rail side wall into conformity.
Once the rail starts to look fair, we then move to this step: Applying fairing material with a curved spreader.
Just a cheap plastic spreader will work.
We bend it and evenly follow the rail edge with the material. This fills in voids and gives us a skim coat to hit with additional sanding with a sponge.
The whole process takes a lot of sanding. No way around it.
Monday, November 11, 2013
And more fairing...
After several passes with sanding between layers of fairing, the bow was getting close. But alas, I sanded through to the foam. I've struck foam! No major deal. I scraped out the offending soft spot and filled with Bondo.
The side rails are getting close. It is to the point were the variations are not visible to the eye. But if you run your hand along the rail, you can feel subtle high spots and depressions.
When we feel these areas, we mark them add a spot fairing and next will move to long board sanding.
To this point we have been using a palm sander and a course grit sanding sponge.
The side rails are getting close. It is to the point were the variations are not visible to the eye. But if you run your hand along the rail, you can feel subtle high spots and depressions.
When we feel these areas, we mark them add a spot fairing and next will move to long board sanding.
To this point we have been using a palm sander and a course grit sanding sponge.
| Sanded through to foam. |
| Filled cavity, ready to sand again. |
| Side rail. |
Wednesday, November 6, 2013
SUP Plug fairing: Step #3
The new Sea State board we are molding is in the first stages of fairing. The substructure, built of wood is as close to fair as possible. This is helpful. It allows us to keep the fairing materials we will add thin and get to the finish sanding stages sooner. If there are underlying rough spots in the plug's structure, you can spend a great deal of time fixing it. It pays to go slow and not create problems that have to be dealt with later.
Today we are giving the entire plug a skim coat of fairing material. Later today it will get a sanding and an additional fairing coat. After that is sanded we will decide if additional passes are needed. Once this process is completed, it will be time to move to spaying gel-coat. Gel-coat bonds to the plug and provides a surface that can be sanded and buffed to a high gloss.
The dimensions of the board are:
12' length
32" max width
5" thick
The estimated volume will be about 230 liters. This will be a stable board for novice riders up to 275 pounds.
| Here is an overview of the bottom of the SUP's plug.. |
Subscribe to:
Posts (Atom)