Showing posts with label sup mold. Show all posts

Saturday, May 24, 2014

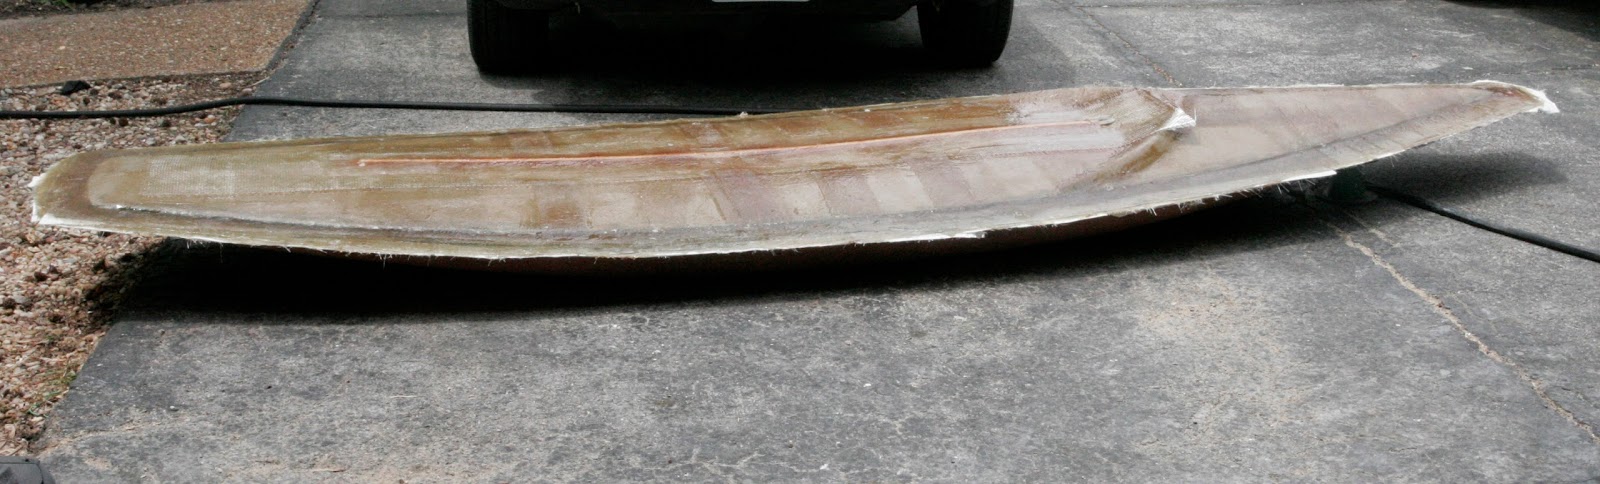
Deck Mold: glass work

We added the layers of glass to the gel coated mold.
After the resin cured to the touch, we moved the whole shebang out to the mid-day sun.
UV light really speeds up the hard curing of resin.
We plan on stripping the mold off the deck plug tonight.

Curing with Mr. Sun.  The edge of the mold will get cut and sanded so it has a nice edge.

This photo shows the two half molds together.
The board will float in this trim, but 3 or 4 inches lower.

Tuesday, May 13, 2014

Sea State 12 foot SUP: deck plug forming

We polished the mold and trimmed the edge of the mold.  But before casting parts we decided to start making the mold for the deck of this SUP.

To do this, we are building up the shape we want in rigid foam and spray foam.  This gets disk sanded to shape.  After we get the shape roughed in, we will cover the foam with glass cloth and epoxy.  We will gradually work the shape into a moldable plug.  Then we will create the mold and will have all we need to begin producing parts.

Here is today's work:

The deck plug being formed inside of the hull mold.
The flange is clearly visible and will provide space to form the deck mold flange.


Tools of the trade.  The pioneers would not be impressed.

A radius edge piece provides a fair line.

Thursday, May 8, 2014

SUP Plug: Step #12 New Mold !

We pulled off the mold today and it looks great.  Much glossier than our last years model.
I can't wait to form our first hull.
Here is a video of popping the mold off the plug:


Here is a close up video of the bow and interior surface before cleaning off the PVA.


Wednesday, May 7, 2014

SUP Plug: Steps 9, 10 and 11 !

After an thorough polishing, we waxed the plug 6 times and buffed it.
Next was a spray coating of PVA. This is Poly Vinyl Acetate.  This stuff forms a very thin film on a plug or mold and allows you to separate the new from the old.  For a large plug or mold, we spray it on with an automotive type paint air gun.  This dries quickly.  It is solvent proof but washes off after the processing with warm water.  After you pull a few parts from a mold, you can leave out the PVA and just use wax.
Next we used the cup gun to apply a layer of gel coat.  We just used regular tinted gel coat.  If we are happy with the shape and plan on making many hulls, we will make a second mold with tooling gel coat which has a harder surface.
Last night we did a wet layup of chopped strand mat fiberglass which was the first layer of glass on the mold.  Today we will add several more layers to make a stiff mold.

the plug after polishing and waxing

PVA (the parting film) and wax

This is the gel coated plug before we added fiberglass.
This coating will be the tooling surface of the working mold.

This photo shows the mold beginning to take shape.  This is the first layer of glass.

Thursday, November 14, 2013

SUP Plug: Step #5 Gel-Coat

The SUP's plug is getting close to the uniform surface we are after.  But from experience we know there are problems that are hard to detect.  One thing that really helps is to spray on a layer of gel-coat.
By giving the surface a uniform color and material, the eye has a much better chance of spotting problems.
With this first layer of gel-coat, we will add a tint color.  Pure white is just too hard to see differences in.    
We also added a wax sanding aid to the gel-coat.  This allows the surface to cure hard so it is easier to sand.
After this layer hardens, we will continue sanding.  What else.

Here is white gel-coat in spay cup and a concentrated
blue tint color we add.

Here are the cup gun parts.
Mixed, assembled and ready to spray.

Thursday, October 31, 2013

SUP Plug forming: Step #2

 After the bow is pulled together, the hull bottom naturally forms a nice gentle v shape.
So now after the shape is secured, we have the heights or thickness of the board established.  The next thing to do is to set the sheer line or top edge of the entire deck surface.
I do this by ripping some 1/4 inch strips of wood (poplar).  I then mark out from the hull bottom 1 inch around the edge of the hull.

I do taper in to "0" at the bow and stern.  Next I shoot in the poplar strips to these markings.  This edge gives us something to fair to and hopefully keep the shape of the sides fair.

Next I fill in the void with foam.  I've used bondo and wood before, but foam is fast and it is only a base for further fairing.

Here you can see the poplar strip at the bottom edge of the sanded foam.

A couple of passes with great stuff, let it firm up then sand it down.

These two photos show the foam before and after disk sanding to the chine and shear line.


 Next I mark the center line with a string to make sure we are straight.  On this board I wanted a detail at the centerline to provide a little thickness for strength.  It will not be a skeg, just a slight rounded v.  The internal deck supports made of carbon fiber tube will rest on this centerline.
To form this, first we start with a furring strip.


The bow will have a pronounced v section and we form this by adding a vertical piece of wood. 
After the epoxy holding it sets, we mark a nice fair transition  and plane it down.


Then we sand it below the eventual
final surface.
Here foam is shot in to conserve
fairing compound.


Next we will start adding many passes of
fairing compound.

Sunday, September 23, 2012

SUP mold

On Friday we had the plug polished and ready, so we sprayed on PVA and prepared to make the mold.  To have everything organized is essential with such a big part.  We precut the variety of cloths used for the mold.  We made sure all the supplies were at hand including a fresh bucket of Vinyl Ester, latex gloves, several respirators etc.
We sprayed on a tooling gel coat Friday night and on Saturday morning we started a wet layup of the mold.  We ended using about 3 gallons of resin.
On Sunday after lunch we were able to easily free the mold and quickly declared victory.  The mold is nice and clean.  There are a couple of voids we will fill and polish in the morning.
On Tuesday we plan on forming our first part from this mold.

This photo (added Oct 7th) is of the first part pulled from the mold:


The mold just after it was popped off the plug.  Wooden shims and plastic wedges are used to prevent scratches.
The mold has some stringers embedded to add strength.  This mold should be able to produce  many parts.

The mold before washing off the pva skin.