Showing posts with label 32 inch band saw. Show all posts

Wednesday, September 24, 2014

Rebuilding the Square Meter: paint stripping

After 4 passes and 6 gallons of paint stripper, we have started to see the strengths and weaknesses of the hull.  This is a race boat and is built accordingly (light).  This is good for us.  The ribs will be easy to duplicate.  They are thin laminations of steam bent oak.  The lower braces are heavy oak but are not very large.  These will be recut out of 8 quarter oak and either directly replace the originals or be sistered in alongside the originals.
Here are photos of the work to date:
The stripped cockpit.  We used stripper to both remove paint layers in the bilge as well as to remove the canvas deck adhesive.

The most recent paint layer was battleship grey.  The early layers were way nicer.  A pale blue layer covered the original orangy red.  Now that's a factory color!


It looks nasty now.  Just wait.


Here is the cut out keel timber,  The top has a rabbet for the planking, the bottom is flat to receive the lead keel casting.
We are duplicating this piece out of oak.  Here is a piece of 8 quarter (2 inch thick) oak.  Additional oak will be pegged and epoxied on to build up the shape.

Here is the big oak passing through the Silver Band Saw.   Finally a piece  of wood
that is the right scale for the saw.  The saw ate through the wood like nobody's business.

Here are two pieces of new oak that we saw cut to shape.  Tomorrow we will bond them together
and continue forming the part.


Monday, January 20, 2014

Silver Band Saw Running!

We needed it for a project so it finally got done.  The big band saw had recently been fitted with guards on the front side of the saw.
The top guard is attached to the traveling guide arm to accommodate various guide heights.
The bottom front guard is fixed but fairly easily removable.
There are no rear guards yet.  This will be remedied shortly.
Being on a budget, we improvised with tires for the saw.  We cut up an inner tube off of a large forklift curtesy of Jonathan W.
Next we wired up a two pole switch to accommodate the 240v wiring.
The saw is powered by a 2 hp motor.  No stationary steam engine yet.
At this point, I was a bit frightened to fire up the motor.  Having had limited band saw adjustment experience, getting the upper wheel set to keep that blade on track was a bit daunting.

But after a few quick on and off cycles it was fairly easy to see how the upper wheel adjustments affected the blade alignment.
So far so good.  The saw is happy and so am I.


The day we acquired the saw.


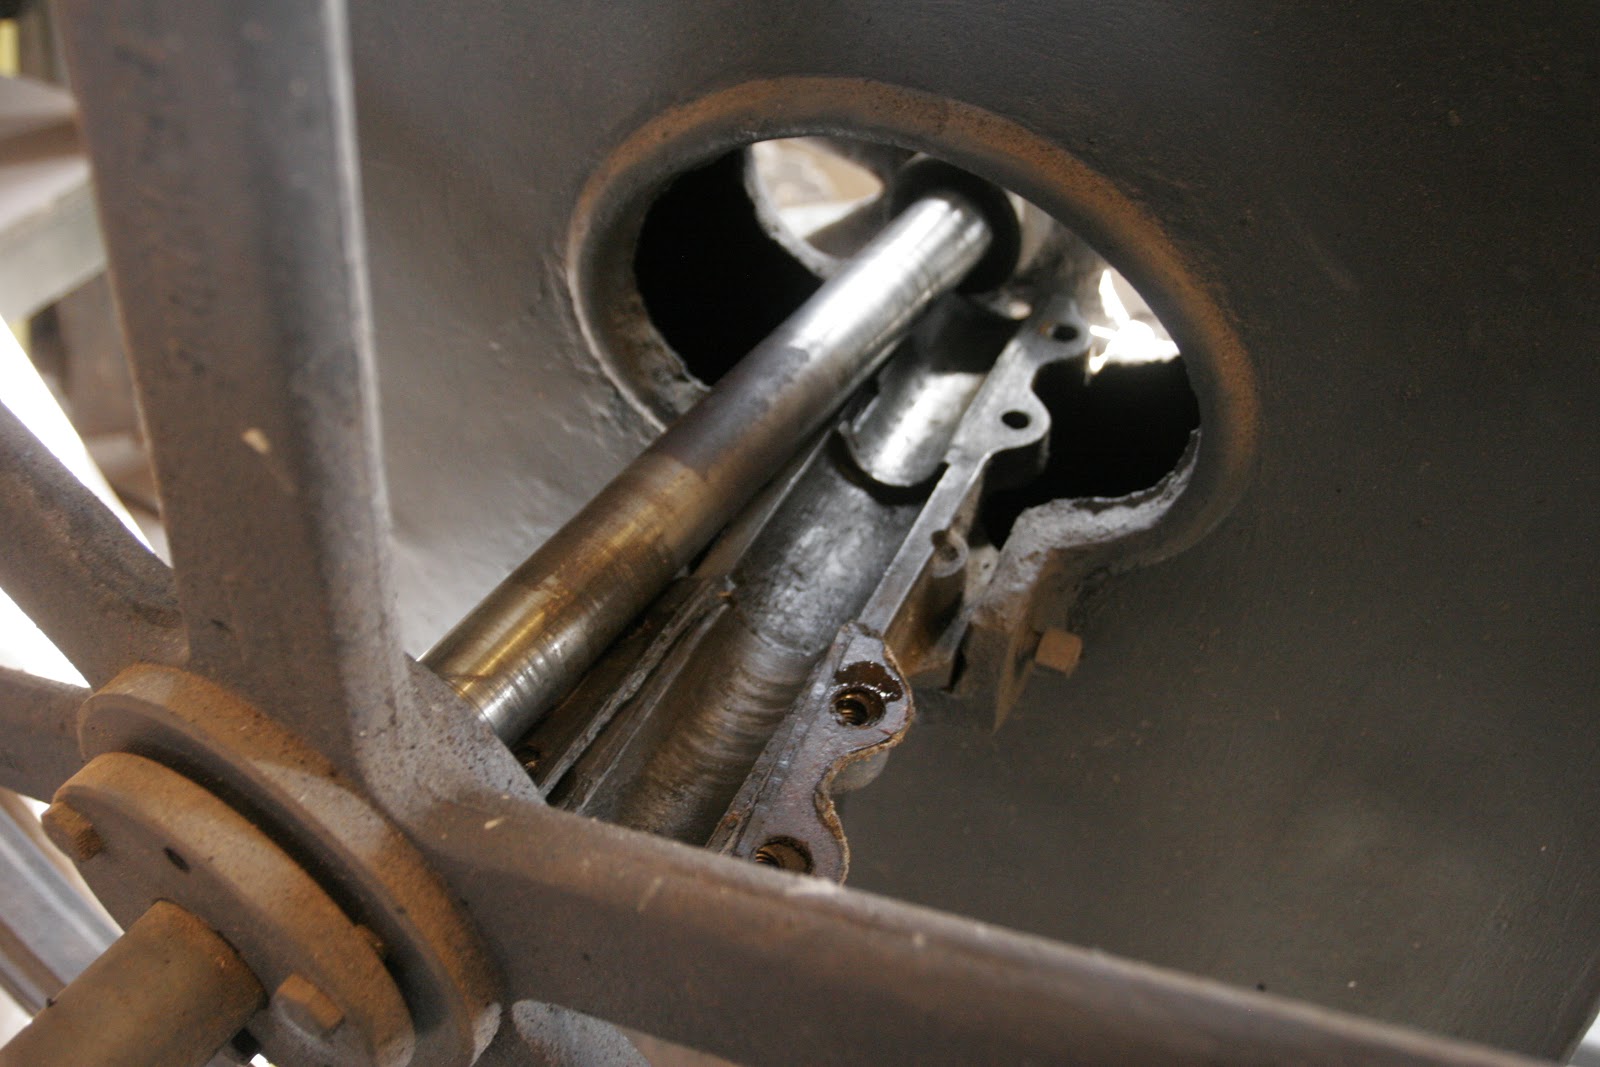
Cleaning out the Babbit bearings.


Tuesday, October 22, 2013

Band Saw guide

The big Silver Manufacturing Co. band saw we are slowly rehabilitating is getting some love.  We disassembled  the original blade guide.  It is at the end of a robust arm held by the upper part of the saw's casting.  It has a simple hand knob to set the guide height.  It is of a heavy enough guage to actually work.
The original guide is a simple design.  Where modern saws have bearing guides, this one has pieces of brass.  We may move to bearings, but first we will try using the unit as it was designed.
The fist at the end of the arm has adjustable sides and these were set with countersunk pieces of brass.
We had leftover brass from the skiff's cutwater so these were an easy replacement.
Here are photos of the saw, arm and guide.  The guide is a large two piece cast iron item.  In the photos the saw looks smaller than it is.  The guide is as large as a softball.
The next step before launch will be the fabrication and installation of guards and a safety switch.

Blade Guide with new brass liners. 


32 inch Silver band saw.


Guide fist stripped of guide brass, knobs etc.


Guide height adjusting knob.


Sunday, March 24, 2013

Band Saw: Upper wheel

The band saw is getting closer to cutting wood.  We ordered two blades from Bandsawbladesdirect.com.
The blades are about 16.5 feet long.  There is some variability because the upper wheel has about a foot of vertical travel.
The one hundred plus year old Silver 32 inch saw is fascinating.
The upper wheel is amazingly like an old timey wagon wheel.  It has a big 5 inch hub that simply rides on a lubricated axle.   It is finely machined and has a simple auto feed oiling design.
It seems sketchy, but after it was all put back together and oiled, you give it a shove and it will spin for over two minutes.
The blades we are going to try first are the following:
1 x LENOX #32 WOOD & CORE BAND Bandsaw Blade (#32) 1/2 inch width
1 x WOODMASTER C-SHARP™ BAND SAW BLADES (c-sharp) 1 inch width
They will stay in the box for a little while as we figure out what tires we will instal on the wheels.

Here are photos of the upper wheel cleaning and reassembly:


Removing the collar.  It has an oil fitting.
Wagon wheel like upper blade wheel.

Upper axle showing the adjustment knob.    The axle rides on an adjustable mechanism.
When you screw the knob in, the axle and the plate it is mounted on pivots up.  This is how you are able to adjust how the blade rides on the wheels.


This is the hole lubricant enters into the axle.  When it is all put back together, the axle can be filled with lubricant.
It then bleeds out of another hole on the underside of the axle.


Spinning for minutes.

Thursday, March 21, 2013

Band saw: Babbitt bearings


About a year ago we purchased a 32 inch band saw made by The Sliver Manufacturing Company of Salem, Ohio.  Since then we have slowly been addressing it's refurbishment.
We think it is from about 1905.
Last year we thoroughly cleaned, sanded and painted the cast iron saw.
Although it had been sitting outside for years, it had very little rust.  Apparently cast iron, unlike steel, forms surface oxidation and stops deteriorating. Steel rots like warm ice unless protected.
We recently purchased a 2 horse 240v motor.
Yesterday we received v belts we ordered from VBeltsupply.com.
It took twin 102 inch belts riding on a sheave we picked up in Alton.
Before running the motor we took the Babbitt bearings apart and cleaned out very old saw dust.
The Babbitt bearings are such a simple and impressive design.
The axle sits in a lead bed set in a heavy cast iron arm.  The two cap pieces have an oil reservoir on top.  Holes in the castings and hand cut channels in the lead let the oil flow through to the large bearing surface of the lead.

We cleaned it all up, reassembled the bearing and fired up the motor.  It spins quietly and gives off the the impression of great mass.

Next we will service the upper wheel.

Here are photos of the process.


Lead lined bearing casting showing oil channels. 
  

There are two of these, one on each side of the shaft.


Looking straight down on the assembly.  You can see the reservoir. 


With the caps removed, the shaft can now be lifted out for cleaning.

The shaft set aside for cleaning.  Both the drive wheel and blade wheel are still attached.


Spinning up to speed.  Keep the kids away!