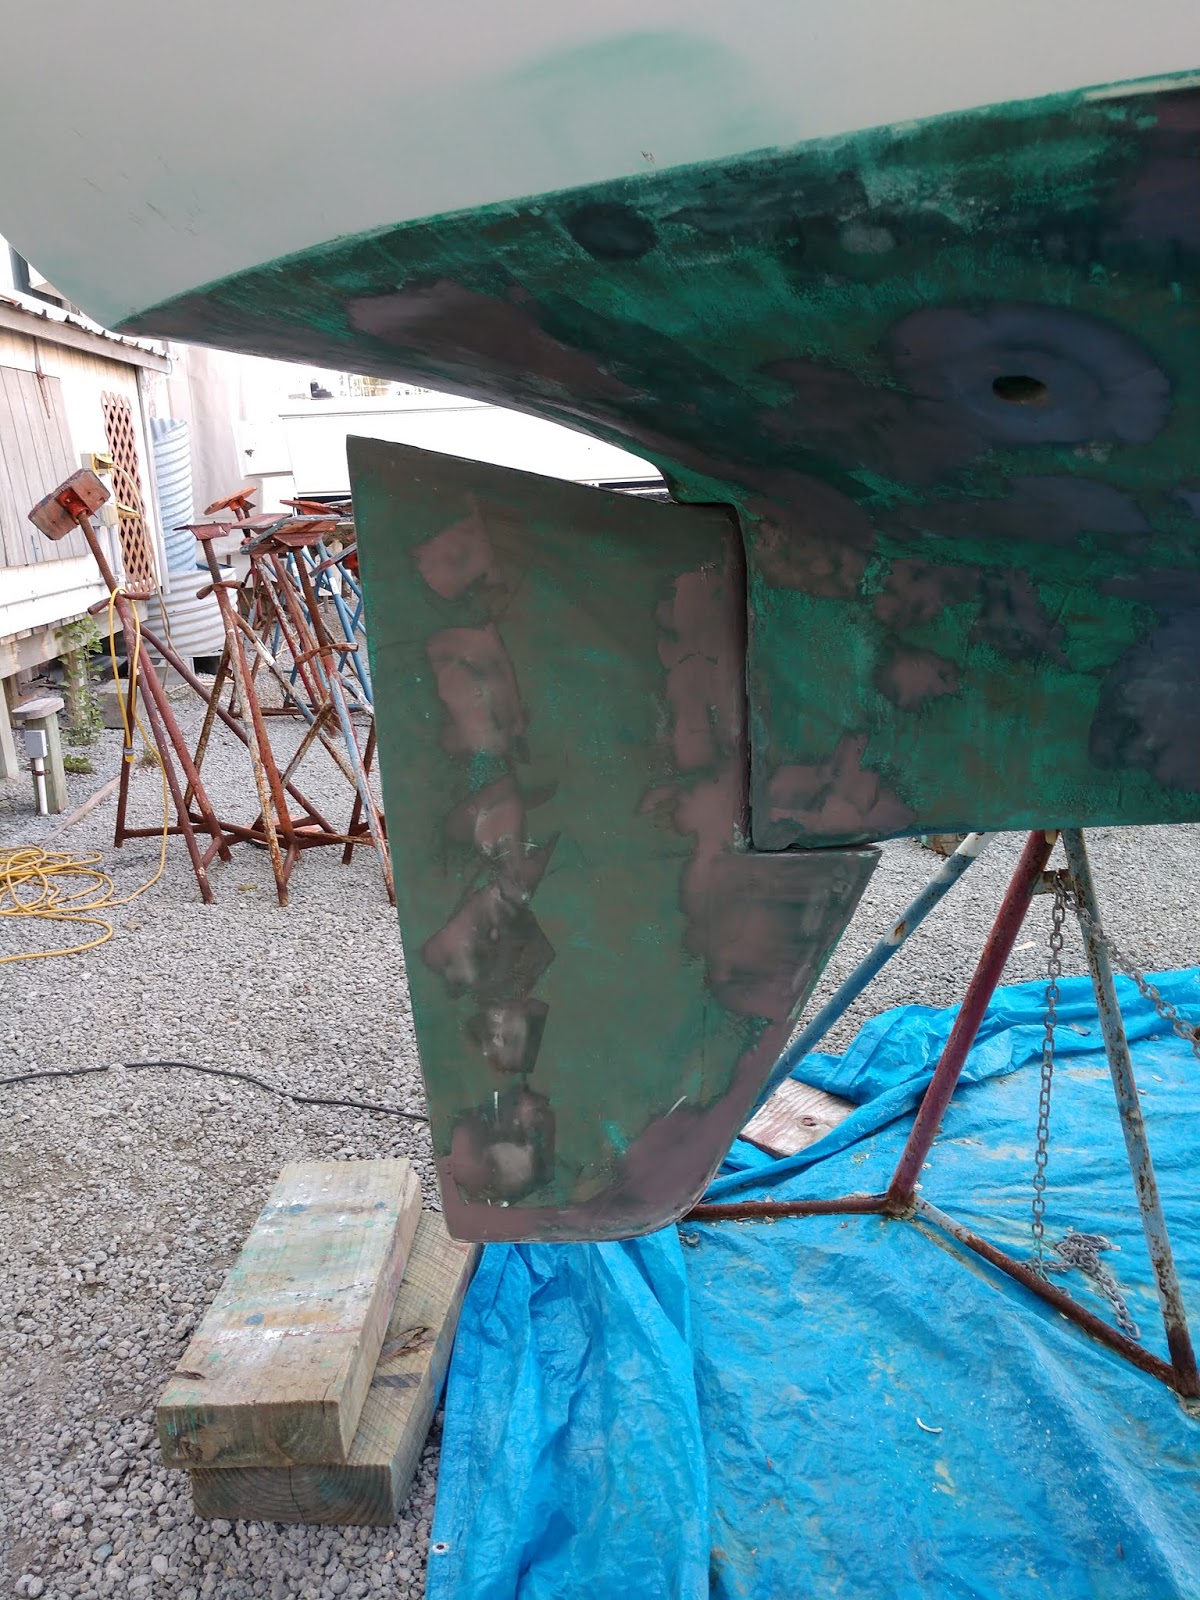
Here are some photos of some projects we completed on the 1978 Sabre before launch.
New raw water thru-hull for engine intake:
This included fabricating a fiberglass backing plate and new Groco bronze.
New Oak battens in the forepeak.
New Cutlass bearing.
Friday, May 22, 2020
Wednesday, April 29, 2020
Saturday, April 18, 2020
Sabre 28: Bottom work
We opened the blisters with a hammer and chisel. I like this better than a disc sander. It is way cleaner and you can be both quick and precise. it has the benefit of preserving the original curvature you can fair to. After the hull dried for 20 days, I filled the voids with West System epoxy with adhesive filler and barrier coat additive.
After this set, It was sanded and got an additional fairing coat. After this was sanded I rolled on 2 passes of barrier coat additive in epoxy.
Today we will lightly sand this in preparation for our ablative bottom paint. We will be using Pettit Ultima SR 60.
After this set, It was sanded and got an additional fairing coat. After this was sanded I rolled on 2 passes of barrier coat additive in epoxy.
Today we will lightly sand this in preparation for our ablative bottom paint. We will be using Pettit Ultima SR 60.
Monday, April 13, 2020
Sabre 28: Keel bolts
Having the boat hauled gave me the opportunity to back out the nuts on the 7 keel bolts with no anxiety.
Glad I did. They were in ok condition. No leaks but the nuts do show signs of crevice corrosion. The bilge is a location where fresh water can lose it's entrained oxygen and start the corrosion of stainless steel. It was also apparent that the washers used where deformed and therefore not dispersing the loading correctly.
To address this I ordered new 316 heavy nuts and 316 over-thickness washers.
The nuts came from :
https://www.albanycountyfasteners.com
The washers were from:
https://www.extsw.com
Both companies provided quality items I would recommend.
After a thorough cleaning of the bolts and bilge surface, the new fasteners were seated and torqued into position with a bit of 5200 providing an additional seal.
Glad I did. They were in ok condition. No leaks but the nuts do show signs of crevice corrosion. The bilge is a location where fresh water can lose it's entrained oxygen and start the corrosion of stainless steel. It was also apparent that the washers used where deformed and therefore not dispersing the loading correctly.
To address this I ordered new 316 heavy nuts and 316 over-thickness washers.
The nuts came from :
https://www.albanycountyfasteners.com
The washers were from:
https://www.extsw.com
Both companies provided quality items I would recommend.
After a thorough cleaning of the bolts and bilge surface, the new fasteners were seated and torqued into position with a bit of 5200 providing an additional seal.
![]() ![]() |
| Before and after. (Different bolts) |
Monday, March 16, 2020
Sabre 28: Haul-out for service
We hauled the Sabre last week at Sail Craft here in Oriental.
We hadn't seen the bottom so I didn't know how extensive our project list would be.
It's not so bad. After the power wash, some small blisters were apparent. These are concentrated on the leading edge of the rudder. There are also maybe 40 penny size blisters distributed around the hull. I opened these and will grind and re-fair.
The prop and shaft had a growth and needed polishing. I removed the shaft to check on the integrity of the dripless shaft seal. It is in good shape. The doubled SS bands were not tight enough but there were no leaks.
The cutlass bearing was shot, so this will be replaced after other work is done.
The depth and speed transponder will be the next project, as well as the ongoing bottom sanding...
We hadn't seen the bottom so I didn't know how extensive our project list would be.
It's not so bad. After the power wash, some small blisters were apparent. These are concentrated on the leading edge of the rudder. There are also maybe 40 penny size blisters distributed around the hull. I opened these and will grind and re-fair.
The prop and shaft had a growth and needed polishing. I removed the shaft to check on the integrity of the dripless shaft seal. It is in good shape. The doubled SS bands were not tight enough but there were no leaks.
The cutlass bearing was shot, so this will be replaced after other work is done.
The depth and speed transponder will be the next project, as well as the ongoing bottom sanding...
The cutlass bearing after some chipping away at the faring material.
Sunday, March 8, 2020
Friday, February 7, 2020
Sabre 28 hatch supports
The Sabre has a lazarette and 2 additional hatches in the cockpit.
One on each starboard and port as is standard.
None of them ever had a support and to access the spaces, you had to use one hand to hold the lid or risk the lid slamming shut on you.
This week I found a fantastic product made by Moonlight Marine.
I bought the 2 my West Marine had in stock and I will get another.
You install them to support the lid in the fully open position. To close the lid you bend the spring and the hatch will close. When in the open position, the spring is rigid and can firmly hold a good deal of weight.
It is a simple and elegant solution. I love them.
Here are some installation photos...
One on each starboard and port as is standard.
None of them ever had a support and to access the spaces, you had to use one hand to hold the lid or risk the lid slamming shut on you.
This week I found a fantastic product made by Moonlight Marine.
I bought the 2 my West Marine had in stock and I will get another.
You install them to support the lid in the fully open position. To close the lid you bend the spring and the hatch will close. When in the open position, the spring is rigid and can firmly hold a good deal of weight.
It is a simple and elegant solution. I love them.
Here are some installation photos...
Wednesday, January 1, 2020
New Year's day regatta
Here in Oriental, we have an "Instead of Football Regatta".
It is a great tradition. I think this year was the 27th annual.
Great conditions and lots of boats of all sizes.
It is a great tradition. I think this year was the 27th annual.
Great conditions and lots of boats of all sizes.
Friday, October 11, 2019
New SUP in the works!
For a few months I have been slowly working away on a new SUP design.
The first SUP design I built was a hybrid wood strip/glass hull board. This was back in 2011
Later I moved to all composite hollow boards of which I made 3 different evolutions.
While each variant was an improvement, our new board will be a major advance in design and awesomeness.
I have paddled a lot of boards an used this experience to drive the design of our new SUP.
It is still in the plug molding phase but is rapidly progressing.
Below are photos of the plug. This was formed with wood strip construction overlaid with glass cloth and resin. These steps were followed with 11 gallons of fairing compound.
We are happy with the shape to this point. The next steps will be gelcoat layers, sanding and polishing.
The plan is to have our first board ready for spring testing.
The first SUP design I built was a hybrid wood strip/glass hull board. This was back in 2011
Later I moved to all composite hollow boards of which I made 3 different evolutions.
While each variant was an improvement, our new board will be a major advance in design and awesomeness.
I have paddled a lot of boards an used this experience to drive the design of our new SUP.
It is still in the plug molding phase but is rapidly progressing.
Below are photos of the plug. This was formed with wood strip construction overlaid with glass cloth and resin. These steps were followed with 11 gallons of fairing compound.
We are happy with the shape to this point. The next steps will be gelcoat layers, sanding and polishing.
The plan is to have our first board ready for spring testing.
Sunday, August 18, 2019
Sabre 28: New electrical panel
One of the few complaints I have found of the Sabre 28 is the placement of the electrical panel.
It was placed just inside the companion way and is often exposed to spray.
Miraculously it still works even after 40 years. This is a testament to the high quality of materials and installation.
The corrosion is an eyesore though, so we decided to begin anew.
We went with a modern blade fuse setup. We picked a great Blue Sea 12 slot Fuse panel.
With the addition of an electrical meter, shunt, terminal block and new toggle switches, the power onboard feels much more reliable.
Here are some photos in process:
It was placed just inside the companion way and is often exposed to spray.
Miraculously it still works even after 40 years. This is a testament to the high quality of materials and installation.
We went with a modern blade fuse setup. We picked a great Blue Sea 12 slot Fuse panel.
With the addition of an electrical meter, shunt, terminal block and new toggle switches, the power onboard feels much more reliable.
Here are some photos in process:
| Once mounted inside of the cabinet, the whole system will be protected from spray. |
Monday, July 15, 2019
Sabre 28: Forestay failure! ...and replacement
While out on an afternoon sail in a 15 knot breeze, our forestay failed with the genoa up.
CHAOS! The mast held up by virtue of our lower forward shrouds. Thank their hearts.
We quickly doused all canvas and as gingerly as we could, motored through the 2 foot chop to our slip.
The next day I rigged a temporary stay, cut the stay, disassembled the Harken furler.
After shopping around online for chainplate fabricators. The prices were high so I ended up ordering 316 stainless from Onlinemetals.com.
So I can leave up the mast, I will work my way around the boat replacing stays as I go.
I increased the thickness of the steel. This is not needed but why not.
The original chainplates lasted 40 years.
CHAOS! The mast held up by virtue of our lower forward shrouds. Thank their hearts.
We quickly doused all canvas and as gingerly as we could, motored through the 2 foot chop to our slip.
The next day I rigged a temporary stay, cut the stay, disassembled the Harken furler.
| It should have been obvious but under the bolt and washer, it was impossible to see a crack. |
So I can leave up the mast, I will work my way around the boat replacing stays as I go.
I increased the thickness of the steel. This is not needed but why not.
The original chainplates lasted 40 years.
| The failed forestay and the new blank. Notice the increased thickness. |
| The new forestay ready to be installed. Safety line attached so I don't lose it in the drink. |
| The new forestay ready for action. |
| The new and old lower forward chainplates. 316L ! |
Friday, June 28, 2019
Boston Whaler!
My son found a 1964 Whaler seriously in need of restoration. It had been holed both on the bottom and in the sole. Fortunately it also had been stored in a barn for a decade and was dry and otherwise sound.
After the hull repairs, he faired out the worst of the gelcoat crazing and gave the boat a fresh finish.
Here are some photos with captions.
First the beauty shot....
After the hull repairs, he faired out the worst of the gelcoat crazing and gave the boat a fresh finish.
Here are some photos with captions.
First the beauty shot....
![]() |
| Back on the water after restoration. Photo: Eifel Kreutz |
| Vac/sanding the fairing. |
| cleaned and prepped for primer |
| Epoxy primer under way. |
Subscribe to:
Posts (Atom)