Saturday, May 31, 2014

We pulled off a great looking SUP hull

The first part out of the mold looks glossy and fair.
This is a 12 foot long SUP.
We made this part out of layers of 8 oz twill glass cloth.
It has reinforcement on the centerline and at the shear.

We will prep the mold for hull number 2 right away.

Here are photos:

The glass edge will of course be trimmed prior to fitting the deck.


SUP: First hull

We prepped the hull mold Thursday, sprayed in white gel coat Friday morning and glassed the board last night and this morning.

We hope to pull this first hull out of the mold this evening.
The next step is to finish polishing the deck mold.

We plan on making the first deck Sunday June 1st!

Heating up in the sun.

The fin box is bonded in.

Sunday, May 25, 2014

Outboard impeller replacement

After you remove this grommet, you can unfasten the transmission linkage.
Our Mariner 5 hp was taken in on a trade last year.  It was spitting plenty of water so we used it for the season but now is the time to replace the impeller.  It is way better to replace it too early that too late.

We ordered the impeller, 2 extra shear pins and a cotter pin from Boats.net.
Here are photos and descriptions of the process:


Here we are removing the prop and unbolting the lower unit.

Here we are removing the impeller housing.
Here is the worn impeller.  Two fins were cracked
so we got it in the nick if time.
If it disintegrates while running, pieces can get lodged in passageways.


Here is the drive shaft assembly.
It is unrelated to the impeller, we just wanted to see it's condition.
Looks good.

This is the new shear pin.  The grooves make for weak spots that will fail if you hit a stump.
This can save the prop.  If you have pliers with you and a spare shear pin, you can keep boating.

Back in business!


SUP deck mold

We stripped the mold off the plug.
This afternoon we trimmed the rough edge and sanded it as well.
The mold looks great.  We will go over it with 1500 grit paper wet then re buff to get rid of the PVA texture.
We added a stringer in the mold on the centerline, but since the profile is thin it still has some flex in it.  We will place the mold back on top of the hull mold and add a rigid frame to it.
Here are some photos of the deck mold:


Saturday, May 24, 2014

Deck Mold: glass work

We added the layers of glass to the gel coated mold.
After the resin cured to the touch, we moved the whole shebang out to the mid-day sun.
UV light really speeds up the hard curing of resin.
We plan on stripping the mold off the deck plug tonight.

Curing with Mr. Sun.  The edge of the mold will get cut and sanded so it has a nice edge.

This photo shows the two half molds together.
The board will float in this trim, but 3 or 4 inches lower.

Thursday, May 22, 2014

Deck plug: ready to mold

After many passes of fairing and sanding the deck plug is ready to mold.
This process was about 10 times faster than the hull plug.  The two reasons for this are the hull is a bit more complicated and secondly, the clock is ticking.  Summer is almost here.  We have got to get this thing done.

The photo shows the plug waxed and coated in PVA.  In the morning, we will spray on the gelcoat and in the evening we will start adding glass to build up the mold.

We expect to start building boards next week.


This photo shows the deck plug on top of the hull mold.  You can get an idea of the board's profile from this angle.
It has a slight rocker and a piercing bow.  It will make a great touring board.

Saturday, May 17, 2014

SUP deck plug taking shape...

We have built up the plug for the deck of our new SUP.  We used foam an now Bondo.
It is getting close to the shape we are after.  There will be more sanding and fairing tomorrow, then we will start the gel coat layers.  Like on the hull plug, the gel coat will give us a surface we can bring up to a gloss.


Tuesday, May 13, 2014

Sea State 12 foot SUP: deck plug forming

We polished the mold and trimmed the edge of the mold.  But before casting parts we decided to start making the mold for the deck of this SUP.

To do this, we are building up the shape we want in rigid foam and spray foam.  This gets disk sanded to shape.  After we get the shape roughed in, we will cover the foam with glass cloth and epoxy.  We will gradually work the shape into a moldable plug.  Then we will create the mold and will have all we need to begin producing parts.

Here is today's work:

The deck plug being formed inside of the hull mold.
The flange is clearly visible and will provide space to form the deck mold flange.


Tools of the trade.  The pioneers would not be impressed.

A radius edge piece provides a fair line.

Thursday, May 8, 2014

SUP Plug: Step #12 New Mold !

We pulled off the mold today and it looks great.  Much glossier than our last years model.
I can't wait to form our first hull.
Here is a video of popping the mold off the plug:


Here is a close up video of the bow and interior surface before cleaning off the PVA.


Wednesday, May 7, 2014

SUP Plug: Steps 9, 10 and 11 !

After an thorough polishing, we waxed the plug 6 times and buffed it.
Next was a spray coating of PVA. This is Poly Vinyl Acetate.  This stuff forms a very thin film on a plug or mold and allows you to separate the new from the old.  For a large plug or mold, we spray it on with an automotive type paint air gun.  This dries quickly.  It is solvent proof but washes off after the processing with warm water.  After you pull a few parts from a mold, you can leave out the PVA and just use wax.
Next we used the cup gun to apply a layer of gel coat.  We just used regular tinted gel coat.  If we are happy with the shape and plan on making many hulls, we will make a second mold with tooling gel coat which has a harder surface.
Last night we did a wet layup of chopped strand mat fiberglass which was the first layer of glass on the mold.  Today we will add several more layers to make a stiff mold.

the plug after polishing and waxing

PVA (the parting film) and wax

This is the gel coated plug before we added fiberglass.
This coating will be the tooling surface of the working mold.

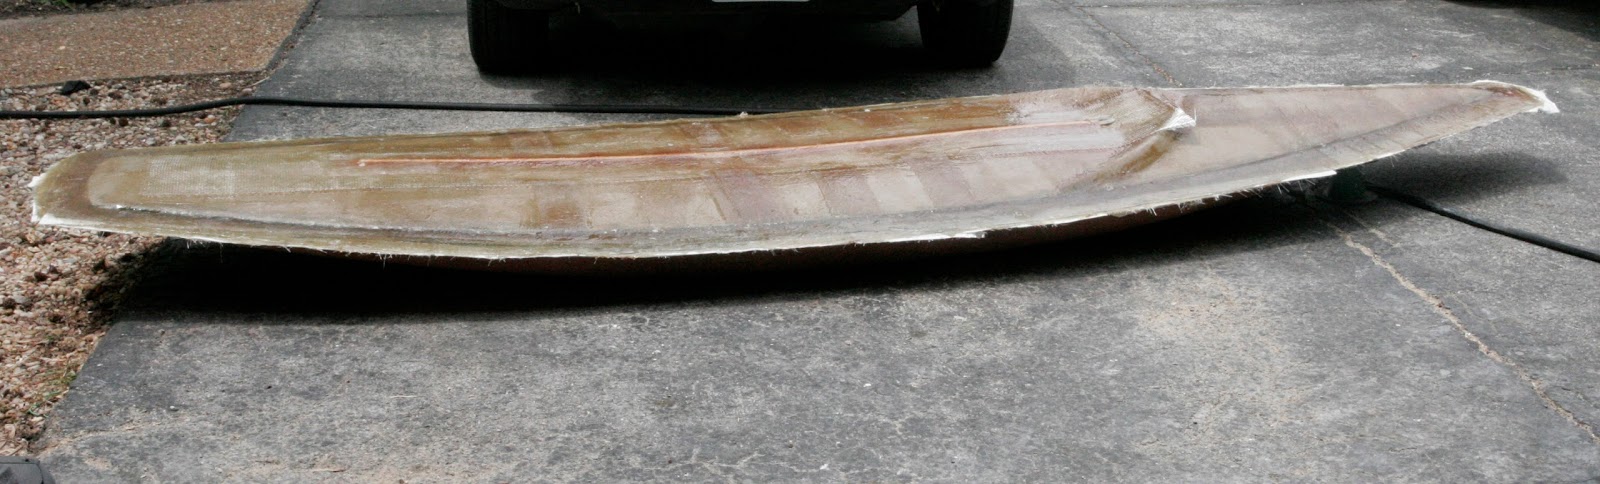
This photo shows the mold beginning to take shape.  This is the first layer of glass.